Sunday, November 27, 2011

Christmas Baking 2011 Dilemma

I usually begin baking on Veterans' Day each year.  For me, that is when the holiday season begins.  I started that day and continued into the weekend.  I made four kinds of cookies that long weekend.  The next week was hectic so I was unable to bake.  The Sunday before Thanksgiving I did a marathon baking session, with the help of my sister in law.  We made four more kinds of cookies.  By the end of that weekend the total number of cookies totalled over 1000...it was 1600. 

The weekend after Thanksgiving started with shopping but, I knew I had to keep going.  I was running low on butter and eggs so I made a trip to a big box store to replenish.  After all, by now, I have used 12 pounds of butter, 20 pounds of flour, 5 dozen eggs, 20 pounds of white sugar, 10 pounds of brown sugar and 10 pounds of chocolate.  So this weekend I made 2 more kinds of cookies and I now have 2000 cookies baked, 10 types complete.  Herein lies the problem, I am adding more kinds of cookies to the repertoire and have upped my goal to make 17 types of cookies.  Based upon this, I am just halfway done.  But, I have no freezer space left.  I have filled a small chest freezer and 2 kitchen sized freezers.  I am on a roll and want to keep going but have nowhere to put the cookies. 

Is anyone out there willing to let me use freezer space? 

Saturday, November 26, 2011

Christmas Cookies - Sugar

Sugar Cookies are a plain looking cookie with a lot of flavor.  They are crisp and delicate and a classic cookie. They have sugar in them, but are not overly sweet. If you want a cookie that has basic ingredients that you already have in your pantry, try making these.

Yields 60 cookies

Ingredients:

1/2 cup butter (1 stick), softened
1/2 cut shortening
2 cups sugar
1 tsp baking soda
1 tsp cream of tartar
1/8 tsp salt
3 egg yolks
1/2 tsp vanilla
1 3/4 cups flour

Here's how:

Preheat the oven to 300 degrees F.

Combine the butter and shortening in the bowl of a mixer.  Mix for 30 seconds.

Shortening and butter in the bowl
Butter and shortening mixed
Add the sugar, baking soda, cream of tartar and salt.  Beat until well combined.

Sugar, cream of tartar and salt in
Sugar, cream of tartar salt mixed
Beat in egg yolks and vanilla until full incorporated.  Scrape down the bowl as needed. 

Stir in the flour.

Flour in
Shape the dough into 1 inch balls.  You can use a 1 inch cookie scoop or your hands to do this.
Place them 2 inches apart on a cookie sheet covered in parchment paper.

Ready for the oven
Bake for 16-18 minutes until the bottom of very light brown.
Done and ready for eating


Cool on a wire cookie rack.


Friday, November 25, 2011

Baked Brie with Brown Sugar and Walnuts


This recipe sounds fancy and looks impressive when made.  However, it is easy to make and is always a hit.  The warm melted brie inside a puff pastry crust allows you to serve this alone or with crackers.   The warm gooey brie melts into the brown sugar and nuts to make a sweet and savory dish.

Ingredients:

1 Puff pastry sheet, defrosted
1/2 cup walnuts, whole
1 8 oz. brie wheel
1/2 cup brown sugar
1 tsp. cinnamon
1 egg

Here's how:

Preheat the oven to 350 degrees F.

Place some flour on the counter and put the puff pastry on top.  Roll it out to remove the creases and make it just 2 inches larger.

Rolled out pastry
Place the walnuts in a dry pan on medium heat.  Toast for about 5 minutes, do not burn.

Remove the nuts from the pan and chop them.

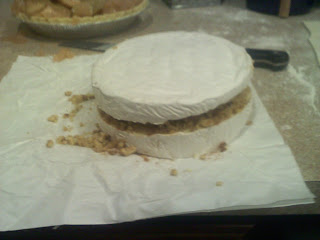
Slice the brie wheel horizontally.  Open it like a sandwich.

The brie wheel
Cut in half
Place the brown sugar on top of the inside of one of the pieces and spread evenly.

Brown sugar added
Place the nuts on top of the brown sugar and spread evenly.

Nuts added
Sprinkle the cinnamon on top of the nuts.

Cinnamon added
Place the top half of the wheel on the mixture, like you are putting it back together.

Closed up
Place the brie in the middle of the puff pastry sheet.

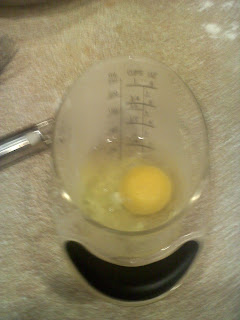
Scramble the egg in a small bowl and add 1 TBS of water, to create an egg wash.

Ready to scramble
Close up the puff pastry using the egg wash as the glue to hold the puff pastry to itself.  Close up all the sides.

Half closed, with the egg as glue
All closed on the bottom
Turn the pastry over to make the seam on the bottom.

Place it on a cookie sheet covered with parchment paper.

Egg wash the entire pastry. 

Pastry egg washed
Bake for 30 minutes, until the pastry is light brown all around.

Remove and serve.
 

Thursday, November 24, 2011

Thanksgiving Dinner Table 2011

Last year I had a lot of tips for you.  Those ideas are still great and you should check them out to see some ideas for setting the table, preparing ahead etc.http://homemadeonli.blogspot.com/2010/11/thanksgiving-dinner-tips.html.

This year, I have a few ideas for you to add to last years tips.  I decided to use gold as my color scheme.  Since my chargers and flatware are gold, it only made sense.  I found some cute napkins in gold and had to have them.  Paired with a gold napkin ring, the napkin is elegant and the embroidered turkey adds some whimsy to the table.  The table cloth contains gold colors and the china has a gold rim.  The table really sparkles as the candles light up the shiny gold on the table.


To get this look, simply grab the napkin from the middle and pull it through the ring.  Place it on the plate with the turkey sitting straight on the plate. 

Candles are more than just candlesticks.  This year I am using floating candles in large cylinders filled with water to add something different.  Glass beads or fresh cranberries could be added to the water as well.

I am serving Cranberry Wine along with the usual choices.  I found it in Vermont on a recent trip to the Quechee Gorge Village.  It is made by Putney Mountain Winery using Cape Code Cranberries.  I saved it just for Thanksgiving.  While this wine is not Long Island local, I did find it on a trip and brought it back with me.  On your next trip to Vermont, pick some up for next Thanksgiving dinner.

I also bought a wire bread basket in the shape of a turkey.  I place 2 napkins in the basket, one on the bottom to sit the bread on and another to cover the bread with in order to keep it warm.  Use the same napkins in the basket as on the rest of the table to keep the theme going and a coordinated look.  This basket is made by Better Homes and Gardens.  It is also a whimsical piece for the table. 


For the center of the table I used the candles from above, some faux carved pumpkins.  The one pumpkin is a turkey and the other says "Give Thanks."  With some battery operated tea lights, they bring the look of the harvest to the table with some twinkling light.  The centerpiece is a floral arrangement placed in a wood and wire holder I use every year and have filled with fall colored flowers.  Here is this year's version:

The table is set for 6 this year.  I have a small crowd but that does not mean that I am skimping on style.  Here is what this year's table looks like:


 In the day or in candle light, the table looks warm and welcoming. Use this ideas as well as last years, to make your table look beautiful.

Wednesday, November 23, 2011

Thanksgiving Dinner - Double Chocolate Peanut Butter Pie

The typical Thanksgiving pies are pumpkin and apple.  Some people also make pecan.  But I am not a big pie lover so I was looking for something different to add to my table this year, that I will actually eat.  I decided to make pie with the perfect combination - chocolate and peanut butter!  This is not my recipe, it is from Food and Wine Magazine, but I have included it here because it is so delicious I had to share it.  This recipe is good for any time, not just Thanksgiving.

Ingredients:

Chocolate Crust:

4 oz semi sweet chocolate, chopped, or use chips
1/2 stick butter (4 TBS)
8 oz. chocolate wafer cookies, such as Oreo, finely ground, about 2 cups

Peanut Butter Filling:

8 oz cream cheese, softened
1 cup chunky peanut butter
1/2 cup sugar
2 tsp vanilla
1 cup heavy cream, cold
3/4 cup salted roasted peanuts, chopped

Chocolate Topping

4 oz semi-sweet chocolate, chopped, or chocolate chips
1/2 cup heavy cream

Here's how:

Make the chocolate crust:

Preheat the oven to 375 degrees.

In a medium glass bowl, combine the chocolate and butter and cook for 20 second intervals, stirring in between, until the chocolate is melted.

Chocolate melted
Stir in the crumbs and mix until incorporated.

Ground crumbs.  I use the food processor to do this.

Crumbs mixed into the melted chocolate
Press the mixture into a 9 inch spring form pan, going up the sides 1 1/2 inch.  Make sure the crust is even and there are no holes.

A spring form pan

Crust into the pan
Place the crust into the oven and cook for 10 minutes.

Make the Peanut Butter Filling:

Combine the cream cheese, peanut butter, sugar and vanilla in a mixer bowl. 

Everything into the mixing bowl
Mix until fully incorporated.

Fully mixed
In another bowl, whip the heavy cream until firm.

Cream

Cream into the bowl

Cream all whipped
Add 1/3 of the cream to the peanut butter mixture and fold in.

Folding in the 1/3 of cream

Fully incorporated
Add the remaining 2/3 of cream and fold it in.

Ready to fold in the last 2/3 of the cream
Pour the mixture on top of the crust and smooth.

Filling in the crust
Lightly bang the pan on the counter to remove air bubbles.

Cover with 1/2 cup of the peanuts.

Ready for the fridge
Refrigerate for 3 hours, until set.

Make the Chocolate Topping:

In a medium glass bowl, combine the chocolate and heavy cream.

Microwave in 20 second intervals, stirring in between, until melted and smooth.

Let the chocolate sit on the counter to cool, until barely warm, stirring occasionally.

Spread the chocolate over top of the peanut butter filling and refrigerate until firm, about 15 minutes.
Ready for the fridge
Sprinkle the remaining nuts around the edge of the pie.

Use a knife to loosen the crust from the pan.  Release the spring form pan and remove.
Ready to eat

Cut and serve.

Tuesday, November 22, 2011

Thanksgiving Dinner - Apple Cider and Honey Brined Turkey

I brine my turkey every year.  Each year I like to try a different combination that will bring flavors which complement the stuffing.  Since I make an apple sausage stuffing, this year I decided to use apple cider in the brine as well as apple juice in the stuffing.  This will add some apple flavor to the bird as well.  I also decided to use honey instead of sugar to add a different kind of sweetness to the brine, it is less harsh.  I also use the basic Thanksgiving herbs.  Begin this process on the Tuesday before Thanksgiving.

Ingredients:

Large pot
1 gallon of water
1 cup kosher salt
3/4 cup honey
1 Large handful black peppercorns
1 Large stem or 2 small stems Rosemary
1 Large stem sage leaves, approximately 10 leaves
1 gallon apple cider
ice
cold water (if needed)
Large container

Here's how:

On Tuesday:

Place all the ingredients except the cider and ice into a large pot.  Heat until all the salt is dissolved. 

Heated water, salt, honey and herbs
Pour the hot mixture into the large container. 

Pour in cider. 

Cider
Add the ice.   You want enough to cool the liquid.  I used the entire tray from the ice maker.

Ice into the mixture.
By this point, the mixture should be cold again.  If not, chill until cold.

Place the turkey into the mixture and make sure it is completely covered and submerged.  If not, add water to cover.  If the turkey floats, put a plate on top to keep it submerged.

This is the turkey I used this year

The turkey taking a bath in the brine
Place the container in the fridge, in a cooler, or (if cold enough) outside.  If it is stored outside, cover to keep critters out.

Let sit for 8-24 hours. 

On Wednesday:

Remove from the brine and rinse under cold water.  You want to rinse off as much salt as possible.

Place the bird in a roasting pan.  Put the pan in the fridge overnight, uncovered.  You want to let the skin dry out overnight.  This will result in a crisper skin.

On Thanksgiving:

Remove the pan from the fridge.  Pour out any liquid that has settled in the bottom of the pan.  If you use this juice your gravy will be too salty.

Cook as usual. 

If you want an idea on how to cook your bird, see my recipe at : http://homemadeonli.blogspot.com/2010/11/thanksgiving-dinner-roasted-and-brined.html