Tuesday, January 27, 2015

Veal Stew


This recipe came to be after I saw a sale for veal stew meat at the local Italian grocery store.  First I made veal stock, the recipe is on this blog, then I made this delicious stew.  The recipe is here as a guide for you as items are easily swapped out.  If you do not have veal stock, use chicken stock or beef stock.  The vegetables in this recipe are based upon what I had in my fridge.  If you do not have leeks, use onion; if you do not have parsnips, add extra carrot; if you do not have baby Bella mushrooms, use white button and; if you do not have white wine, use red wine or just add extra stock.  This stew is hearty and warming on a cold winter day.  Enjoy.

Makes 3 quarts of stew.  Serves 6-8.
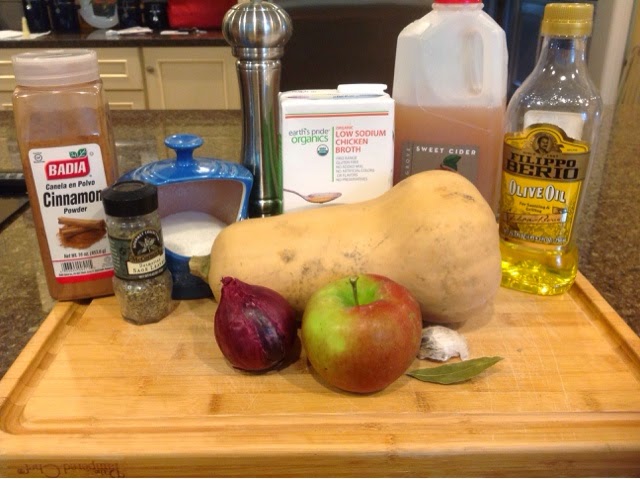
Ingredients:

2.5 lbs veal stew meat, cubed
1/2 cup flour
Salt
Pepper
8 TBS olive oil
2 large carrots, diced
3 large celery stalks, diced
1 small parsnip, diced
8 oz. baby Bella mushrooms, cut into quarters, stems removed
3 garlic cloves, minced
1 1/2 cups white wine, I used Chardonnay 
1 14 oz can diced tomatoes 
2 cups veal stock
2 Bay leaves
5 fresh thyme sprigs or 2 tsp dried thyme
2 TBS fresh parsley, minced, or 2 tsp dried parsley

Here's how:

Heat a large Dutch oven or large soup pot on medium heat on the stove.

Meanwhile, put the flour, 1 tsp salt and 1/2 tsp pepper in a zip top bag or a bowl.

Dredge the meat in the flour.  

Add 2 TBS olive oil to the Dutch oven and brown the meat in three batches.  Brown on all sides.  Add 2 TBS of oil to each batch.


Remove the meat after each batch and set aside in a plate or in a bowl.  

Add the last 2 TBS of oil to the pot and add the carrots, celery, parsnip, mushrooms, and leeks.  Sauté for 5 minutes, scraping the bottom as you do it to loosen any meat bits from browning the meat.


 Add the garlic and sauté for 1 minute.

Add the wine and use a wooden spoon to loosen the rest of the brown bits on the bottom of the pot.  Cook 2 minutes until almost all the wine has evaporated.


Add the stock and tomatoes. Stir it all in. 


Add the meat and stir it in. Make sure it is all covered by the liquid.

Add the Bay leaves, thyme, parsley, 1 tsp salt and 1/2 tsp pepper.


Stir it all in.

Bring the pot to a simmer, reduce the heat to a simmer and put the lid on the pot.

Cook for 2 to 2.5 hours until the meat is tender.  Remove the lid after 1 hour.  Do not over cook the meat or it will dry out.  Once the meat is tender and can be pulled apart easily, it is done.

Remove the Bay leaves and thyme stems.

Eat and enjoy now, place in the fridge for up to three days or freeze up to 6 months.

Tuesday, January 20, 2015

Veal Stock in the Pressure Cooker

A recent addition to my kitchen is a pressure cooker.  I bought an electric version so it feels safer than that one I remember my grandma using and it is easy to use.  I decided to make a recipe using it that was simple and stock is a great one to try in it.  Veal was on sale at my local Italian market so veal was the choice for today.  If you like to make stews or gravies using veal, this is the base for it.  You can make this recipe on the stove top too.  At the time when you add the items to the pressure cooker, simply add it all to a large pot on the stove and add 8-10 of water to the pot to account for evaporation and cook it for 3 hours on a low simmer.

Ingredients:

2.5 veal bones, I used neck bones
3 large carrots cut into 3 pieces
2 large onions, cut in quarters, skin can stay on
4 celery stalks, cut into 3 pieces
1 head of garlic cut horizontally in half
2 TBS olive oil
1 tsp salt
1/2 tsp pepper
1 cup red wine
6-8 cups water
2 Bay leaves
5 thyme sprigs

Here's how:

Preheat the oven to 425 degrees F.

Place the veal bones, carrots, onion, celery, garlic, oil, salt and pepper in a roasting pan and toss to coat.


Place the pan in the preheated oven for 30 minutes.

Remove the pan and toss again.

Return the pan and roast for another 30 minutes.

Remove the pan from the oven.

Place all of the roasted meat and vegetables into the pressure cooker.

Pour the red wine into the roasting pan and use a wooden spoon to scrape the pan of all the brown bits on the bottom of the roasting pan.  This is where the flavor is.  

Pour the wine from the pan into the pressure cooker.  

Add water to fill to the max line, between six and eight cups and the Bay leaves and thyme stems to the cooker.


Bring the cooker to pressure according to manufacturers instructions and cook at pressure for 30 minutes.  

Turn the cooker off after the thirty minutes and let cool naturally, do not release the steam yourself.

Remove the lid. 

Strain the stock of all the solids and discard the solids.  I use a strainer over a large bowl.  


Pour the stock Into smaller containers.  


Either let it sit on the counter for a while and remove the fat with a spoon or let it sit overnight in the refrigerator to cool.  After it is cooled, remove the fat solid at the top of the container.


Refrigerate for three days or freeze for up to one year.  

Enjoy.

Tuesday, November 25, 2014

Thanksgiving Table 2014

This year is my first year in my new home.  After nine Thanksgivings in my old house, this is my tenth year hosting the holiday. I look forward to many more in my forever house.  

Here is what the table looks like this year.

I wanted to stick to some of the old traditions I have for my table. I like to use my gold charger plates and Goldwater.  My turkey center piece has been on every table I have had. It was a gift for my first Thanksigiving dinner hosting.  

I am also using my turkey napkins. They are gold and match my gold color scheme.


I bought new glasses for this year's dinner.  They are a bit whimsical for such a formal setting but I think they are cute and make the table fun. You cannot see it in the picture but they say "Gobble 'till you wobble".  

The two pictures above show a small gold bar underneath the glass.  It is a knife rest.  I found them when I was unpacking my new house.  They were something I inherited from my mom and I decided to use them.  Let's see if anyone knows what they are at dinner.

Sunday, November 2, 2014

Butternut Squash Soup with Apples


It has been a while since I have posted.  I sold my home and bought a new one.  In between the sale and purchase, I had to rent for six months.  During that time, I was out of sorts and most of my things were in storage.  I am back and trying to get back into the swing of things.  Here is the first recipe I have created in my new kitchen.  

This recipe uses chicken stock but if you want to make it vegetarian you can use vegetable stock.  If you do not have apple cider on hand, substitute vegetable or chicken stock for it and add an extra apple or two to add more apple flavor and sweetness.  I made this recipe using ingredients from my fridge after a few trips to local farm stands.  I used a red onion because I think it is sweeter when cooked, but you can use any kind you have on hand.  In this recipe the cinnamon is optional, I did not use it but you may want to add some for an additional layer of flavor.  This recipe does not use any dairy to make the soup creamy, it is creamy enough from puréeing it.

Makes 3 pints

Ingredients:

2 TBS olive oil
1 small red onion, diced
1 apple, any kind, peeled, cored and diced
1 large butternut squash, diced
1 garlic clove, minced
2 cups chicken stock, homemade and organic preferred
2 cups apple cider, local preferred
1/4 tsp dried sage, or 1 fresh sage leaf, whole
1 Bay leaf
1/4 - 1/2 tsp cinnamon (optional)
Kosher salt
Pepper

Here's how:


Using a medium to large soup pot or Dutch oven, preheat the olive oil over medium heat.

Add the onion and apple.  Add a pinch of salt and pepper.


Sauté the onion and apples for 10 minutes.

After ten minutes, add the squash and another pinch of salt and pepper.


Sauté the squash for 7 minutes.


Add the garlic and sauté for one minute.


Add the rest of the ingredients, except the cinnamon.


Cover and reduce the heat to a simmer.  Simmer for 30 minutes.


After 30 minutes, remove the lid, remove the bay leaf and sage leaf if used. Turn off the heat.


Use and immersion blender or a regular batches to purée the soup.  Do it in batches if using a blender.


Add the cinnamon now, if using, and serve.  You can freeze this for future use.


Tuesday, July 8, 2014

Tomato, Mozzarella and Basil Salad


This is a classic summer salad.  Fresh tomatoes and basil are coming into season.  Add some fresh mozzarella and you have a light salad that is perfect for a casual weekday dinner or a fancy dinner party.  This is something that is just assembled and not cooked, perfect for a warm night.  I use all local and organic ingredients from my local farm stand and the garden.

Serves 6 to 8 as an appetizer

Ingredients:

3 large tomatoes, cleaned.  Do not use plum. Red, green, yellow or any color will look and taste great
1 lb fresh mozzarella
1 bunch fresh basil, cleaned
Salt
Fresh cracked pepper
Olive oil
Balsamic vinegar

Here's how:

Cut the tomatoes into slices, between a half and a quarter inch thick.

Slice the mozzarella into the same size slices.

Pick off large basil leaves. 

You should have an equal number of tomato and mozzarella slices and basil leaves.


On a large platter or plate, time to assemble the salad.

In three rows next to each other, layer a tomato, then a basil leaf and then a slice of cheese.  Try to make the cheese and tomatoes the same size as you layer for a better appearance.  


Continue layering as explained above until you have filled the plate or you run out of ingredients.   Any extras are a snack for you!  

Lightly sprinkle a pinch of salt and then a pinch of pepper over the top.  Cut up four or five extra basil leaves you have and sprinkle them over the to too.


Serve with olive oil and balsamic vinegar on the side and sprinkle a bit of each on top right before you eat it.  This is to taste and need not be done if you do not like them.  It just adds an extra punch of flavor.