Tuesday, November 22, 2011

Thanksgiving Dinner - Mashed Turnip/Rutabaga


Every year for Thanksgiving my mom made mashed turnip.  So did her mother and her mother and so on.  Mashed turnip is something that I grew up eating on Thanksgiving.  But it was not until recently that I discovered what I had been eating all those years has been rutabaga.  So, I call this recipe mashed turnip but it is really mashed rutabaga.  It is a large root vegetable that you need a large sharp knife and lots of arm strength to get through.  The ones you find in the store will have a wax coating on them.  I make this recipe the way my mom did, with a sprinkle of nutmeg.  Rutabaga is an old fashioned food but for me, it is full of family memories.  I grew my own rutabagas this year but they are easy to find in local grocery stores.  You will see that the stores use the word rutabaga and turnip interchangeably.  Turnips are small, potato sized vegetables.  Rutabagas are large softball sized veggies with a wax coating.  You can mash them both but the flavor of the rutabaga is so much better.  Mashed rutabaga was only served on Thanksgiving, so it may be more associated with the holiday meal than any other food.  My great grandmother used to serve hers mixed with mashed potatoes. 

Serves 10-12

Ingredients:

2 large or 3 medium sized rutabaga, cut into cubes, yields 8-9 cups
water
1 cup milk
4 TBS butter
1/8 tsp freshly grated nutmeg

Here's how:

Peel and cube the rutabaga.
Rutabaga whole

Cubed rutabga
Place the cubed rutabaga into a large pot.  Cover with water.

Water added
Place on the stove top and bring to a boil.

Once it hits a boil, reduce heat to a simmer.

Simmer for 1 hour to 1 hour and a half until the rutabaga is fork tender.  If too much water evaporates, add some while cooking.

Strain the pot.

Place the rutabaga, milk, butter and nutmeg in a large bowl and use a mixer to completely blend and mash until smooth.

If it is too thick, add more milk until it is the consistency of mashed potatoes.
 

Monday, November 21, 2011

Thanksgiving Dinner - Cranberry Sauce

Cranberry sauce is a Thanksgiving table must have.  The tart sauce pairs so well with all the rich and savory foods that are already on the table.  It also adds great color to the plate.  I used to buy the jarred version of jellied cranberry sauce but it was just so strange to put it on the table with the lines from the can still imprinted on it!!  So when I found a beautiful mold, I knew that it was time to have something pretty and delicious on the table instead of the jarred version.  This recipe is from Williams-Sonoma, as well as the mold, and it is so easy to make.  The best part is that this must be made a day before so you don't have to worry about making it the day it is served. It can even be made two or three days before if you want to spread out the work.  If you do not have a fancy mold you can use a casserole dish - it still tastes the same.

Ingredients:

1 1/4 lb fresh cranberries
1 1/3 cups granulated sugar
2 tsp orange zest
1 cup fresh orange juice
pinch of salt
1 cup water, divided
1 package powdered gelatin

Here's how:

In a large saucepan over medium-high heat, combine the cranberries, sugar, orange zest, orange juice, salt and 3/4 cup plus 2 Tbs. water.

Fresh Cranberries
Sugar added
Freshly zested orange
Freshly squeezed OJ
Everything added to the pot
Bring to a boil, then reduce the heat to medium-low and simmer, stirring occasionally, until the sauce thickens and the cranberries have burst, 25 to 35 minutes. Note: The sauce should measure no more than 3 3/4 cups.
All cooked down
Meanwhile, pour the remaining 2 Tbs. water into a bowl and sprinkle with the gelatin. Let stand until the gelatin softens and swells, 5 to 10 minutes. 

Gelatin (top) blooming
Spoon 3/4 cup of the hot juices from the cranberries into the gelatin and whisk until the gelatin has dissolved.

Gelatin added to hot cranberry.  Combine well.
If you prefer a sauce with a smoother texture, transfer the remaining cranberry mixture to a food processor and pulse for 2 seconds (10 to 15 times).
Added to the processor
Pour the gelatin mixture into the cranberry mixture and whisk to combine.

Gelatin added to the mix and incorporated
Lightly coat the inside of a ceramic cranberry mold with nonstick cooking spray. Pour the cranberry mixture into the prepared mold and let cool to room temperature.
This is the mold I use

Spray the inside with non-stick spray

Cranberry sauce added to the mold
Cover loosely with plastic wrap and refrigerate for at least 8 hours or up to overnight. 


To unmold, set the mold in a large bowl of warm water (115° to 120°F) so the water reaches almost to the rim of the mold. Let stand for 30 seconds, then remove the mold from the water. Carefully insert a small offset spatula or paring knife along the side of the mold.

Gently pull the gelatin away from the mold to release the suction, then remove the spatula. Place a serving platter upside down on top of the mold and invert the platter and mold together. Gently shake the mold until you hear the gelatin begin to release, then lift off the mold. If the gelatin does not release, return the mold to the warm water for 15 seconds, then repeat the steps as directed above. Serves 14 to 18.

Finished and plated

Friday, November 18, 2011

Baking Substitute for Pumpkin or Apple Pie Spice

It is Thanksgiving morning and you are putting together your pumpkin or apple pie.  As you follow along the recipe you come to the point where you need pumpkin or apple pie spice.  You reach into the cabinet and find that you are out!?  What do you do?  Don't worry, this is an easy problem to solve.  This spice is really just a combination of several other spices.  Just make up a batch using this recipe and keep it in the cabinet for the next time and you never have to buy it again, simply use what you already have.  If you double or triple this recipe you will have extra on hand for the next time you need it.

Makes 1 Teaspoon

Ingredients:

1/2 tsp cinnamon
1/4 tsp ground ginger
1/8 tsp ground nutmeg
1/8 tsp ground allspice

Here's how:

Combine it all together and mix well.

Thursday, November 17, 2011

Oktoberfest - Pumpkin Carrot Cupcakes

This year I decided to make a seasonal cupcake that contains not one vegetable but two.  I had carrots from the garden and a can of pumpkin, although fresh pumpkin could be used.  I know this is not a traditional Oktoberfest recipe, but it is a seasonal recipe that goes well with the savory foods served.  It is a nice balance of sweet icing and flavorful cake.  Here is a little secret: kids love this cupcakes.  You can get them to eat vegetables by making these cupcakes.  Just don't tell them!  This can also be made as a cake instead of cupcakes.  If you want to make this even healthier, use apple sauce for half the oil and whole wheat flour for half the flour.

Makes about 28 cupcakes

Ingredients:

3 cups flour
1 TBS pumpkin pie spice
2 tsp baking powder
1 tsp kosher salt
1.2 tsp baking soda
3/4 cup canola oil
3 eggs
3/4 cup sugar
3/4 cup brown sugar
1 15 oz can pumpkin puree (not pumpkin pie)
1/4 cup 2% or whole milk
2 tsp vanilla extract
1 cup grated carrots (about 2 medium)
1 cup chopped walnuts (optional)
Cream Cheese Frosting

Here's how:

Heat the oven to 350 degrees.

Place liners in the cupcake baking pan.

Whisk together flour, spice, baking powder, salt and baking soda in a medium bowl.  Set aside.

In the bowl of a mixer, combine oil, eggs, sugars, pumpkin, milk and vanilla.  Mix until combined.

Add the flour mixture into the wet ingredients.
 
Add the carrots and walnuts, if using.
Freshly grated carrots
 
Everything mixed in.  Ready for the pan
Bake for 18-22 minutes, until a toothpick inserted into the middle comes out clean.

Let cool and ice with cream cheese frosting.  Decorate if desired.
Decorated with pumpkin candy

Wednesday, November 16, 2011

Pumpkin Spice Quick Bread

It's fall and nothing says more about this season than the flavors of pumpkin.  This quick bread recipe is easy to make and have all the savory flavors of fall cooking.  You can make this bread in your usual loaf pan or a decorative one, like I have (the pictures are shown below.)  Serve this with coffee as a breakfast treat or even as a dessert.   

Ingredients:

1 1/2 cups flour
1 tsp cinnamon
3/4 tsp baking soda
1/2 tsp baking powder
1/2 tsp ground ginger
1/4 tsp kosher salt
1/4 tsp freshly grated nutmeg
10 TBS unsalted butter, melted
1/2 cup brown sugar, packed
1 cup sugar
3 eggs
1 cup pumpkin puree
powdered sugar

Here's how:

Preheat the oven to 350 degrees F.

Grease your loaf pan using a non-stick spray.
It is sprayed.  This pan has a pumpkin patter which is shown when the bread is done
Place the flour, baking soda, baking powder and spices in a medium sized bowl.  Whisk together.  Set aside.
All the dry ingredients in the bowl

Dry ingredients mixed in the bowl
In the bowl of your mixer, combine the butter and sugars. Beat for 2 minutes.

Add the eggs and pumpkin.  Beat until combined for 2 to 3 minutes.
Eggs and pumpkin in the bowl
Add the flour mixture in two batches. 
All the flour in.  Be sure to scrape down the side to incorporate all the flour
Pour the batter into the prepared pan. 

Bake for 1 hour and 15 minutes to 1 hour and a half.  It is done when a toothpick inserted into the middle comes out clean.

Remove from oven and cool.  Top with powdered sugar and serve.

Sunday, November 13, 2011

Blood Orange Rhubarb Jam

I know, it sounds strange right?  Blood oranges with rhubard.  But the tart rhubarb is well balanced with the citrusy fruit and the color from blood orange makes this a beautiful jam.  Bllod oranges are hard to find but I was able to get them at Uncle Guisseppe's grocery store.  They are small like lemons with the usual orange rind but the inside is blood red.  You can use regular oranges for this recipe but you will miss out on the special color and flavor of the blood orange. 

Ingredients:
3-4 blood oranges
2 1/2 lbs rhubarb, diced
1 package powdered pectin
6 cups sugar

Yield: 7 half pints

Here's how:

Prepare sterliized jars and a water bath for canning.

Grate the zest off 1 blood orange.  Set aside

Squeeze the juice from the oranges to get 1 cup.  Set aside.

Combine the zest, juice and and rhubarb into a large saucepot.

Simmer for 3 minutes, covered, until the rhubarb is tender.

Stir in the pectin and bring the mixture back to a boil.

Add the sugar and stir until completely dissolved.

Bring the mixture to a full rolling boil and keep if there for one minute, stirring constantly.

Remove the jam from the heat and skim off any foam.

Ladle into prepared jars, leaving 1/4 inch of head space.

Top with lids and screw bands.  Process for 10 minutes.

Remove and set aside to cool.  After 24 hours, check to make sure the lids have sealed.  If so, store for up to one year.  If not, place in the fridge.

Saturday, November 12, 2011

Oktoberfest - Kielbasa with Cabbage, Potatoes and Apples

Oktoberfest means beer and food.  This recipe included the traditional cabbage, sausage and warmth.  This recipe is made easy by cooking in the slow cooker.  Just put the ingredients in the cooker and let it cook itself.  When your guests arrive you will have dinner ready and can enjoy your Oktoberfest party without spending the entire time in the kitchen. 

2 apples, cored and sliced in 1/4-inch slices.
1 medium size head of cabbage, sliced into small wedges
2 medium potatoes peeled and sliced into 1/4-inch slices
2 large links kielbasa, sliced into 1/2-inch pieces
1 C. water
1 tsp. sugar
1/2 tsp. olive oil
salt and pepper to taste

Layer ingredients in crockpot starting with cabbage wedges, kielbasa, apples, then potatoes.

Cabbage in

Apples sliced and in

Potatoes sliced, they go in too

Sliced kielbasa added on top
Whisk together water, sugar, olive oil, salt and pepper. Pour over layers into crockpot. 

Whisked together
Cook in slow cooker on low for 6 hours or high for 4 hours.

Serve with mustard on the side.

Friday, November 11, 2011

Pork Roast with Creamy Apple Cider Sauce

The original recipe can be found in the November 29, 2011 Woman's Day.  It looked so good, I made it the day after the magazine arrived.  The sauce is full of flavor but the mustard is not overwhelming, the way Dijon mustard can be.  I also substituted a pork loin for the tenderloin called for in the original for one simple reason.  The loin was on sale! If you love pork and are looking for make a recipe that is full of fall flavor, this just may be your new go-to recipe.

Ingredients:

1 1.5-2 lb pork loin
3/4 tsp kosher salt, divided
1/2 tsp black pepper, divided
1 TBS olive oil
2 TBS flour
1 cup chicken broth
1/2 cup heavy cream
2 TBS Dijon mustard
2 TBS chopped parsley

Here's how:

Preheat the oven to 425 degrees F.

Season the pork with 1/2 tsp salt and 1/4 tsp pepper.

Heat the olive oil in a large oven safe skillet over medium-high heat.

Brown the pork on all sides.
Seasoned meat in the pan

One side done

Last side browning, the ends are left
Place the skillet in the oven and bake for 50-55 minutes, until the meat reaches 165 degrees F.  

Remove the meat from the oven.  Place the meat on a cutting board and cover with foil.  It will come up to 170 degrees F while sitting.  This is the ideal temperature.
Pork cooked and sitting on the side
Stir the flour into the broth, until dissolved.  Add to the skillet with the browned pork bits and drippings.
Flour and broth added

All mixed up

Add the apple cider and simmer for 5 minutes, scraping up the browned bits from the bottom of the skillet.  Stir occasionally.
Cider added
Add the cream, 1/4 tsp salt, 1/4 tsp pepper and mustard.  Cook for one minute.
Cream added
Add the parsley. Turn off the heat.
Parsley added
Slice the pork and serve with sauce over the top.
Sauce over the pork and ready to eat

Thursday, November 10, 2011

Strawberry Peach Jam

This jam came as a result of leftover fruit after making other things.  I had some strawberries and peaches in the freezer so I decided to combine them to see what kind of jam they would make.  They make a great combination.  They are both sweet but not overly so.  If you find yourself with leftover fruit and not enough to make a full batch of either peach or strawberry jam, try making this one.  This jam would be great in a linzer cookie or on breakfast toast.

Ingredients:

3 cups strawberries, crushed
2 cups diced peaches
5 cups sugar
2 TBS fresh lemon juice
1 box powdered pectin

Yield: 14 pints
Here's how:

Prepare sterilized jars and a water bath canner.
Combine the strawberries, peaches and lemon in a large pot.

Peaches and strawberries in a pot
Add the pectin.

Pectin into the pot
Cook the mixture to a full, rolling, boil, stirring constantly.

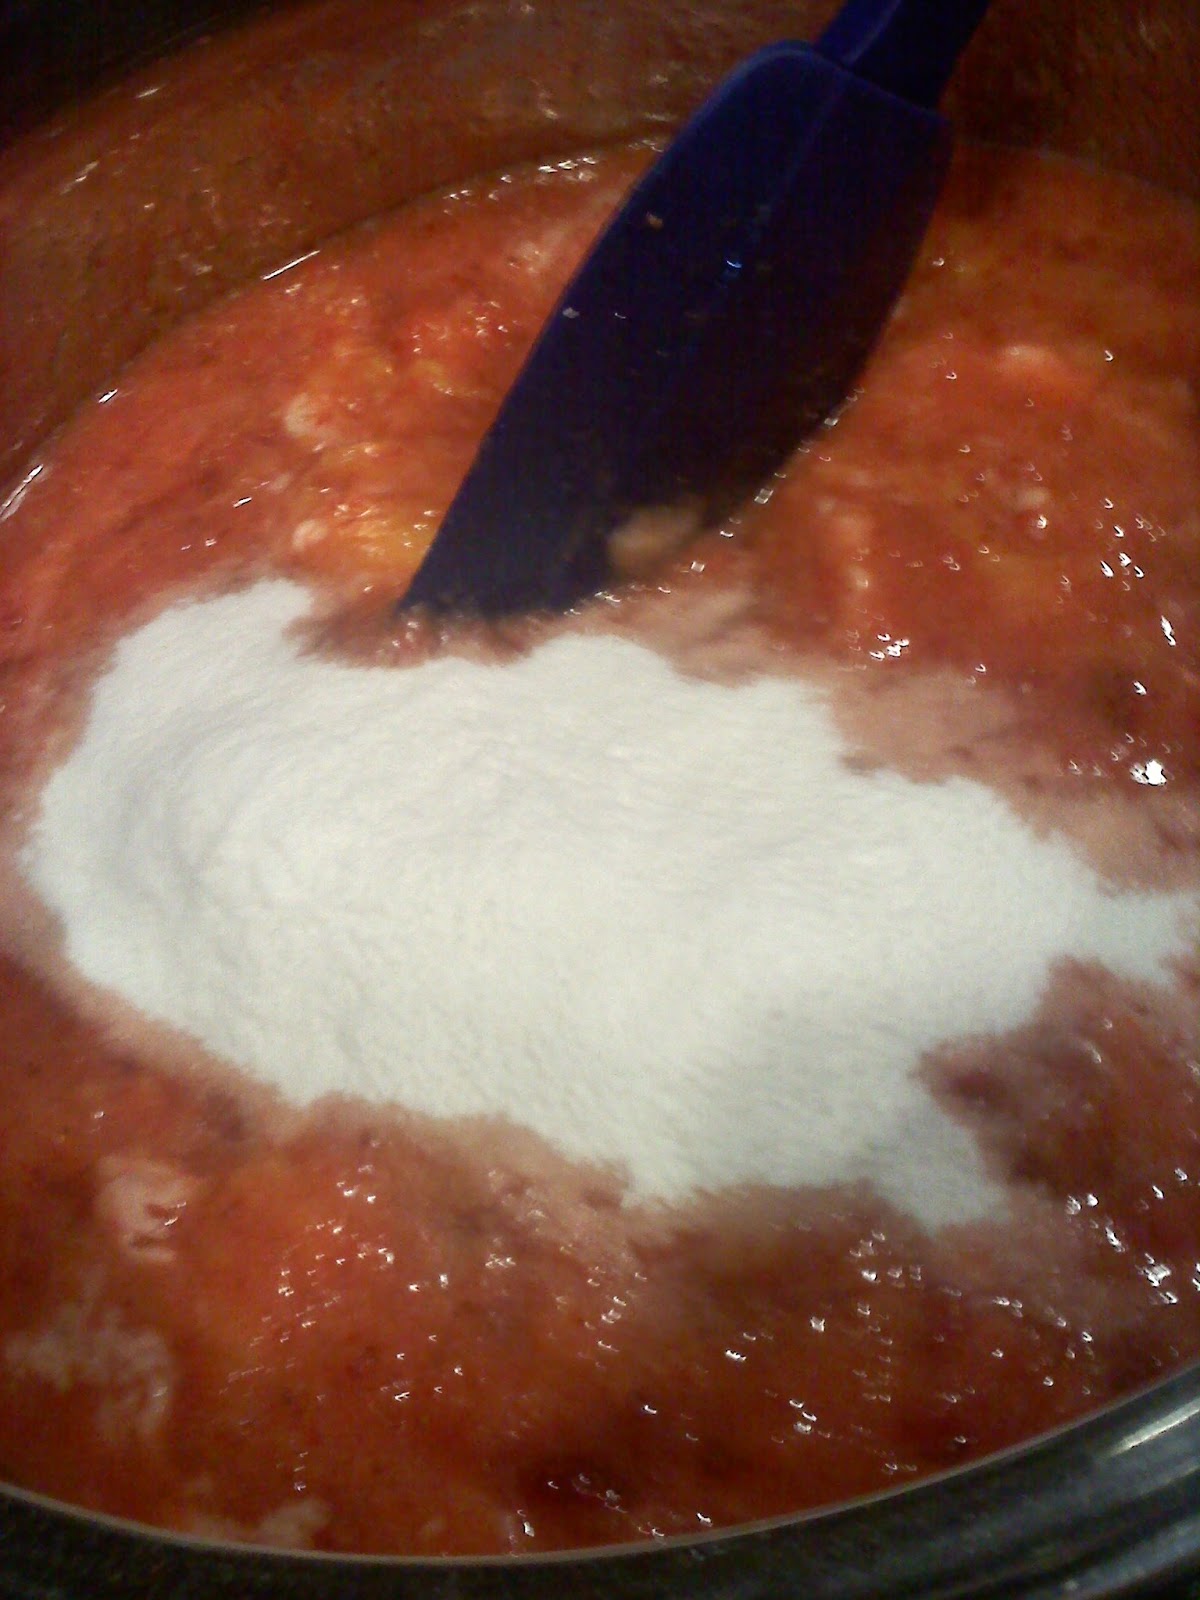
Stir in the sugar and mix well.  Cook to a full, rolling boil and let cook there for one minute.
After boiling for 1 minute
Skim off the foam.

Ladle the jam into prepared jars, leaving 1/4 inch of head space.  Place on lids and screw bands.
Prepared jars
Process for 10 minutes in a water bath.
Jars in the bath
Remove the jars and let cool in a draft free room for 24 hours.  Store for up to one year.  If the jars do not process, store in the fridge for up to 3 weeks.
Jars upside down for 24 hours

Wednesday, November 9, 2011

Fall 2011 Garden Chores

Today I took a day off to spend in the garden.  I have to admit that I have been neglecting the garden since the end August.  The weeds and crabgrass took hold and I was too tired to fight anymore.  I kept saying I was going to sow spinach, beets and carrots again for a fall crop but I didn't.  The high hopes of the spring garden did not hold true for the fall garden.  I bought mums but never planted them.  They looked OK sitting in the beds still in pots!  The impatiens have wilted in the pots and hanging baskets and the vegetable plants have turned black.  The leaves are now falling and can be put into the compost...I just have to do it. 

OK, so now that I have complied my short comings, there is something I did get done.  I planted bulbs and started my Memory Garden.  One thing that I have wanted to do for a long time was plant a garden in all pink to give me place to remember my Mom.  I lost her to breast cancer 7 years ago and whenever I am in the garden, I think of her.  She loved to garden and I wanted to do something special to bring her love of gardening together with mine.  I decided to do a pink garden, preferably planted with plants which send proceeds to breast cancer research.  I missed out on the spring plants but I found bulbs from Eurobulb, LLC which donate 30 cents per package to Susan G. Komen for the Cure. 

The bulbs I found were tulips in 3 varieties.  "Angelique" are late spring bloomers, which grow to 16-20 inches and are fragrant light pink double flowers resembling peonies.  "Beauty in Pink" are mid-spring bloomers 16-20 inches high that are a pink and violet assortment of tulip hybrids.  "Hope Blooms" are mid-spring bloomers which grow 12-16 inches high and are a white and pink with pink mottling tulip.  I planted 72 bulbs and added bulb food to the hole before filling it in.  I planted them by digging a trench and intermixing the bulbs together for a full dense appearance. 

I also planted 2 hydrangeas that are a lace cap variety I found at Lowe's on a clearance rack for $2 each. I placed them in the area I had designated for the Memory Garden 2 months ago and let them sit there alone.  I also planted 2 pink Echinecea plants to fill in the area.  I would like to find other breast cancer awareness plants and garden decorations to fill it in.  I have been eyeing a pink ribbon garden flag that says "Faith", which was my mom's name.  I just need to place the order for it on Amazon.  There is also a garden gnome and birdhouse I have been looking at which also send proceeds to Susan G. Komen for the Cure.  For now, I am happy with the start and will use the winter to acquire the other items and to look for more plants to fill in the garden.

I also planted some Allium varieties in another area of the garden.  I planted some "Globemaster" Alliums a few years ago and I realized that they add such great height and interest that I needed to get some more.  I found a pack of 20 bulbs of mixed varieties.  I planted 3 "Gladiator", 3 "Mont Blanc" a white variety, 4 "Purple Sensation" and 10 "Schubertii" a short spiked purple variety.  I planted these by digging a hole and then planting multiple bulbs in each and sprinkling bulb food over the top.  A grouping of plants always looks better than single plants, and Alliums look especially good when planted together.  I got a great deal at Costco on all the bulbs for $20.  Fall is the time for planting spring bulbs and it is getting late in the season.  As long as the soil is not frozen, you can still plant them.  Get out there and plant yours.

The last thing I did today was put compost in the garden.  I have an Enviro-Cycler and my first batch of compost was done.  I dumped it into the vegetable bed and now I have another batch of compost going in the bin.  The compost looked good.  I also tilled the vegetable garden.  Since I have squash vine borer worms in my soil, I read that tilling in the fall will bring them to the surface and, hopefully, kill them.  Since I do not want to use chemicals to kill them, this is an organic method to get rid of them.  I guess I will not know next season if this method works.  This is my last resort.  I am out of options for getting rid of them. 

Last harvest of 2011
I also did my last harvest of the year.  I pulled all the rutabagas, carrots and leeks.  The leeks were small but I was proud of them.  I started them from seed in February and now I have about 6 leeks!  I have about 2 lbs of carrots, 6 rutabaga and 2 pumpkins of a green varierty.  It was bittersweet to harvest everything for the last time.

The final chore (which I WILL do) is to clean out all the pots and hanging baskets and put them in the garage.  I am going to leave one pot out that has an evergreen in it and decorate it with silver glittered branches and red balls for some Christmas cheer.  What are you doing to make your garden have interest into the Winter?